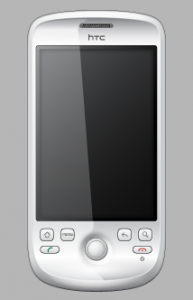
Vodafone released an over-the-air update to Android 2.2.1 (Froyo), and you want to install it on your phone. But what if you’ve already rooted your Magic and installed a custom ROM like CyanogenMod or SuperD? If that’s the case you won’t be able to download the update, unless you revert your phone to the (latest) official Android.
If you were smart enough to keep your Nandroid backup safe, the job is easy:
1) Copy the backup files (system.img etc.) to the sdcard:\nandroid\xxxxx\yyyyy (x and y being the string Nandroid generated when saving your backup).
2) Startup your phone with the Power button, while holding down the Home button, so it will boot into Recovery.
3) Using the trackball select Nandroid | Restore.
In my case this didn’t work out as expected: Nandroid stopped with errors like “directory not found”, and “file not found”. The Nandroid backup I was trying to load was created by Amon-Ra Recovery, while the Clockwork Nandroid on my phone expected the files to be in a different directory on the SD-Card.
Using ROM Manager I created a new back-up. Inspecting the SD-Card showed that the app saves it back-ups somewhere in sdcard:\Rommanager\, adding your original backup in a subdirectory in there should do the trick. Start Nandroid from within ROM Manager or the phone’s Recovery mode.
The system I recovered sadly wasn’t the Android I was hoping for. Instead of the Donut 1.6 the backup contained a CyanogenMod custom ROM I had flashed earlier this year. As this was the only backup I owned, I needed a official ROM from the Net. Here’s what to do.
Getting your HTC Magic back to stock version.
The Vodafone 1.6 Over-the-Air update can be downloaded from the HTC website after submitting your Magic’s serial number. The download is an (protected) setup executable, so it cannot be flashed from Recovery. And the setup isn’t always working as easy as you might expect.
Installing 1.6 Vodafone on your HTC Magic 32B (happy flow)
1) Download the 1.6 update from http://www.htc.com/nl/supportdownloadlist.aspx?p_id=246&act=sd&cat=all, save it on your Desktop. The file I’m using is named RUU_Sapphire_Vodafone_NL_1.91.172.1_DRC92_signed_NoDriver.exe.
2) Connect your phone to your computer using a USB cable
3) Run the file you just downloaded, Next, Next, Next.
4) You’re done.
I my case the ROM Update Utility (RUU) was not able to connect to my phone: “Error 170: USB Connection Error”. I tried extracting the update from the Installshield, which didn’t work, but in a few hours I finally managed to get Donut my phone. Here’s how:
Installing 1.6 Vodafone on your HTC Magic 32B (the hard way)
 1. If you haven’t done so already, download the 1.6 from http://www.htc.com/nl/supportdownloadlist.aspx?p_id=246&act=sd&cat=all, save it on your Desktop. The file I’m using is named RUU_Sapphire_Vodafone_NL_1.91.172.1
_DRC92_signed_NoDriver.exe.
2. Also download the Android SDK from http://developer.android.com/sdk/index.html, install it to c:\android-sdk-windows.
3. Start the Android SDK Manager and let it download all packages.
When finished close the Andoid SDK Manager.
4. Connect your Magic using USB and launch the RUU Setup you downloaded in step 1. Do not click Next just yet.
5. On your Windows computer, press WIN+R so a small Run window pops up, type %tmp% and press Enter. Your Temp-directory will open. In it find the directory created just a minute ago (it was named {734585F9-04C3-4864-9532-50264C72C222} on my system). In it there’s a file dotnetinstaller.exe and a subdirectory. Copy the subdirectory to your Desktop, open it and keep it open. You can close the RUU Setup, we don’t need it anymore.
6. In a different Explorer window, open c:\android-sdk-windows. In the subdirectories tools and platform-tools find the files fastboot.exe, adb.exe, AdbWinApi.dll, and AdbWinApiUSB.dll. Copy the files to the subdirectory you found in step 5, overwriting the files already there.
7. To make sure your phone can be connected to by your computer, press WIN+R so Run shows up again, type CMD and press enter. In the Command Prompt window type
cd \android-sdk-windows\platform-tools <enter>
adb devices <enter>
Your phone should be mentioned in the connection list that is shown on your screen.
8. Go to the folder you created on your desktop in step 5. The Setup file you need is now called ARUWizard.exe, run it and start clicking Next-Next again. This time the installer should be able to communicate with the HTC Magic and it will install Android 1.6.
Once your HTC Magic has rebooted, setup the Android Market, after which a download prompt will pop up: You’re ready to install Vodafone’s Android 2.2.1.
Updated on december 12th on request by “lipid”.

Hi there, how did you overwrit the files bicouse in my sistem (windows 7 ), when you do this its telling you thet the file is used from anader program and this is it ???
I tried shortening the tutorial a bit, but I now see that didn’t work.
What I actually did:
While your RUU_Setup is still running (and waiting for you to click Next), copy the Setup directory (in your Temp) to your desktop. In there you will be able to replace the files. Run ARUWizard.exe to start the Setup again.
Thanks for your feedback, I will update the tutorial right away!
Regards,
Rik